Aka I woke up late and didn't sleep enough and look like crapola....
Being a new mom and working full time there have been more than a handful of mornings when I definetly didn't get enough sleep the night before. I'm also blessed with natural mega-dark undereye circles. The scary zombie look isn't very flattering on me, but some mornings I'm so tired and running short on time that I don't really feel like doing a full makeup application. What to do? How do you fake looking awake in a time crunch? This is what I did yesterday (please do your best to ignore the mop on my head, I'm growing my hair out and don't have an appt for a trim until Tuesday):

1) I started by washing my face and applying my facial sunscreen. After that I applied
Smashbox Photo Finish Color Correcting primer to give a nice even base. I didn't plan on wearing foundation so I wanted my skin to look as smooth as possible.
2) If you are like me you don't EVER leave the house without concealer. I made that mistake once and you wouldn't believe the comments I got! Using my ring finger and patting gently I applied
Bobbi Brown Creamy Concealer (in porcelean) under my eye and to the inside corners beside my nose.
3) If you want your concealer to last you must set it with powder. For double duty (and because I wasn't planning to use shadow)I took a larger shadow brush and swept
MAC Studio Fix powder all around my eyes. This helped to set the concealer and brightened and gave an even color to my lids.
4) Everyday I take a good look at my skin. I don't wear the same makeup two days in a row. Somedays a bit of spot coverage is all I need, somedays I wear a tinted sunscreen for a bit more coverage and some days if I want to look polished and professional I'll break out the foundation.
I have rosacea so I frequently have redness on my cheeks and around my nose. I like to use
MAC Studio Stick Foundation on problem areas (instead of concealer) when I'm not applying a full coverage foundation. I'll just use it to cover up the red areas. Yesterday I only needed to add a bit around my nose.
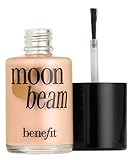
5) Instead of applying eyeshadow I opted to apply hilighter to my brow bones, inner corners of the eye and my cheekbones. My fave right now is
Benefit High beam. Add a few dots to the cheekbones, brow bone and inner corner of the eye and pat (don't run) with your finger until blended. Its an easy way to give your eyes some definition and make you look more awake - plus adding it to your cheekbones gives you a fresh glow.
6) To my cheeks I applied a cream blush -
Stilla Convertable Color in lillium. On days when I don't wear foundation and powder I like to stick with cream or gel blush. If you apply a matte blush when the rest of your look is light and dewy it can look unnatural, plus powder blush is more likely to streak if you don't apply it over powder.
7) I curled my eyelashes to help open they eye area and applied a couple of sweeps of Loreal Voluminous mascara in Blackest Black.
8) I finished it all off with a coat of Smashbox Lip Paint in Artiste on my lips.
Voila! Like I said - it SOUNDS like a lot but really it only took a couple of minutes.